Thursday, March 29, 2012

For dinner tonight: Chicken Pot Pie!

Ok, technically I made this for dinner last night, but you get the idea.  This is one of my favorite dinners to make.  It is quintessential comfort food, both to eat and to cook.  The recipe is relatively simple to follow, but there are a lot of steps, and it dirties pretty much every dish in the kitchen, so it feels like you're doing some real, fancy cooking :-) Following is the recipe and a few (way too many) pictures:

Chicken Pot Pie
(adapted from Pam Anderson's cookbook The Perfect Recipe)

1 recipe Pot Pie Dough (follows)
1 1/2 lb boneless, skinless chicken breasts
2 cans chicken broth
1 1/2 tbs oil
1 onion, chopped
2 cups chopped carrots
2 cups chopped celery
salt and pepper
8 tbs butter (1 stick)
1 cup flour
3 cups whole milk
1 tsp thyme
6 tbs dry sherry
3/4 cup frozen peas
3 tbs parsley

Pot Pie Dough

1 1/2 cups flour
1/2 tsp salt
1/2 cup butter (1 stick), chilled and cut into 1/4" slices
1/4 cup vegetable shortening, chilled
ice water

Directions:

Step 1: Prepare and refrigerate the pie dough until ready to use

Mix the flour and salt in the bowl of a food processor fitted with a steel blade.  Scatter the butter pieces over the flour, tossing slightly to coat.  Cut butter into flour with five 1-second pulses.  Add the shortening and continue cutting until the flour is pale yellow and resembles coarse cornmeal, about four more 1-second pulses. 
Turn the mixture into a medium bowl.  Sprinkle mixture with 3 tablespoons of ice water and fold water into the mixture with a rubber spatula.  Press down on the dough with the broad side of the spatula.  Add up to 2 tablespoons more water if the dough will not come together.  Gather the dough into your hands and flatten into a 4-inch disk.  Wrap the disk in plastic wrap and refrigerate for at least 30 minutes, or until ready to use.

Step 2: Cook the chicken.

Preheat oven to 400 degrees F.  Put the chicken and the broth into a soup kettle or Dutch oven over medium-high heat. 
Cover and bring to a simmer; simmer until meat is just done, 8-10 minutes.  Transfer chicken to a large bowl, and transfer the broth to another bowl.

Step 3:  Cook the veggies.

Return the pot to the stove, increasing heat to medium-high.  Heat up the oil.  Add the onion, carrots, and celery; saute until just tender, about 10 minutes.  Season to taste with salt and pepper.

Step 4:  Shred the chicken.

While your vegetables are cooking, use 2 forks to shred the chicken into bite-size pieces. 
If you have a significant other hanging around, this is a good task to delegate to them...

Step 5:  Reward your loyal apprentice with a piece of chicken.  Then wash the slobber off your hands.

Step 6: Make the gravy.

Transfer your cooked vegetables to the large bowl with the shredded chicken.  Set aside.
Return the pot to the stove; reduce heat to medium.  Add the butter to the empty pot.
When the foaming subsides, whisk in the flour and cook for 1-2 minutes, whisking constantly so as not to burn the flour. (You're making a roux)
Whisk in the reserved chicken broth, milk, any accumulated chicken juices, and thyme.  Bring to a simmer, stirring until the sauce fully thickens.  Season to taste with salt and pepper.  Stir in sherry.

Step 7:  Put everything together.

Pour the sauce over the chicken/vegetable mixture.
Stir to combine.

Step 8: Notice that you do not have frozen peas when you had previously assumed you did.  Call your husband, who is on his way home from work, and hope that he is still at the store picking up the other various items you asked him to get on his way home.  Cover the pot pie filling with aluminum foil and wait until your husband comes home with those pesky peas.

Step 9:  Roll out the dough.

Unwrap your disk of pie dough, and roll it out to the approximate size of your casserole pan in between 2 sheets of parchment paper.
Since you are still waiting for your husband to arrive home, put the rolled-out dough (still between the sheets of paper) onto a cookie sheet and stash it in the fridge.

Step 10:  Bide your time by washing the large pile of dishes you have accumulated.

Step 11:  Stir the peas and the parsley into the pot pie filling.
Turn mixture into your casserole pan of choice.  I use my huge LeCreuset pan, but you can certainly use 2 smaller pans or several individually-sized pans.  Whatever you have on hand.

Step 12:  Finishing touches.

Take your rolled-out pie dough out of the fridge.  Peel one piece of parchment paper off, exposing the dough.  Turn the exposed side on to the top of the pie filling, and quickly but carefully peel off the other side of the parchment paper.  (This step is definitely easier if you have refrigerated the rolled-out dough for a few minutes before using it.  Otherwise, the heat of the filling starts to soften the dough, and it likes to stick to the 2nd piece of parchment, making it very frustrating to remove.)  Cut a few vent slices into the top of the dough.

Bake for about 30 minutes, until the crust is golden brown and the filling is bubbly.  Let stand for about 10 minutes out of the oven, so it can firm up.

Step 13: Nom.

Like I said, I always have fun making chicken pot pie.  I don't think any of these pictures were particularly helpful or necessary to the making of the pie, but I had fun taking them...it made me feel like a celebrity chef with my own cooking show.

Monday, March 26, 2012

weeding and pruning

David and I had an exceptionally productive two days this weekend.  Saturday started with the aforementioned end table purchase, but after that, we cleaned out the basement.  We sorted through ALL the boxes we put down there because we didn't know what else to do with them when we moved in two and a half years ago.  Some of these boxes travelled with me from my parents' house, to my old apartment, back to my parents' house, then to David's and my rental house, and finally here.  They held keepsakes and junk I don't expressly need but don't want to get rid of.  I decided to throw away all my old school work, but keep the newspaper from the day I was born--donate David's lovely dish set with the deer painted on them (not exactly Royal Doulton's...), and keep the tablecloths from our wedding.  After reducing our basement box collection to about half its original size, we took a massive haul to Goodwill and loaded up the back of the truck with garbage for a dump run.

Sunday, we had gorgeous weather; the temperature reached almost 70 degrees! You wouldn't guess that from today's weather, a lovely slush/rain mix all day long.  David and I took our garbage to the Waste-to-Energy plant in the morning.  I think the spring-cleaning bug has bitten a bunch of other people in Spokane, too, because the dump was crazy busy. 

We took the scenic route home with our windows rolled down, and when we got to the house, it was just too nice out to go inside.  I moved my flower seedlings from the second bedroom window out to the greenhouse.  Then I replanted all the seeds that hadn't appeared yet.  I have been growing veggies for several years now, but I'm still relatively new to growing flowers...they're a little more finicky than veggies.  Last year I saved a bunch of the dead flower heads from the zinnias and dahlias I planted, so I could get the seeds and plant more this year.  The zinnias seem to be doing well enough--I've had a lot of sprouts--but none of the dahlias have come up, so I planted snapdragons instead. 

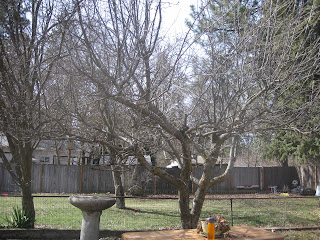
After all that, I weeded my daffodil bed (no small task), and David pruned our mature apple tree.  Finally, we went over to my parents' house for a nice dinner of spicy pull-apart beef barbecue stuff (tastes much better than it sounds...).  Take a look at weeding and pruning pictures:

Daffodil bed, before

Daffodil bed, after (look at those sprouts poking through!!!)

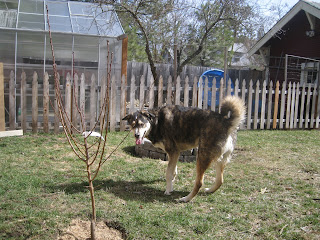
Random picture of Seamus the dog enjoying the sunshine (and our new apricot tree)

David in the apple tree


The apple tree, after pruning.  We're aiming to open up the center of the tree to the sun over the next couple of years.

Saturday, March 24, 2012

New Furniture!

Hi everybody!  Today is a beautiful, sunny spring morning, i.e. the perfect morning to buy some furniture!

The hubby used to work up in Hillyard, and every day he would drive through the little section of Market street with all those quaint antique shops and old brick buildings.  Ever since then, we've been meaning to meander through those shops and see what they have to offer.  Well, one of the shops, O'Brien Used Furniture, has a website that we look at now and then to see their monthly specials.  For the past couple weeks, we've been drooling over an end table set, and today we got it!  Take a look:

David's putting the legs back on; we had to take them off to fit the tables in the car.

End table #1

Coffee table, all set up with David's XBox controller and Diet Coke

End table #2 in our future reading nook. 
I'm planning on building bookshelves with my dad to go behind this chair and end table.

Thursday, March 22, 2012

Starting a blog and starting a garden

So, I decided to start a blog.  I have to admit, I'm kind of nervous.  Will anybody read it?  Will I post as often as I mean to?  Who knows?  I might as well give it a shot.  I love reading my friends' blogs because it feels like a way to keep up with what's going on in their lives, even though we don't live as close to each other as we used to or talk to each other as often as we'd like.  I think that's what I want this blog to be: a way for friends, family to keep up with what's happening in my life, keep up with what projects--mundane as they may be--I'm working on. So here goes...

Right now in Spokane, it's trying to be spring.  When I wake up in the morning, I can expect to see anything ranging from wet, heavy snow to glorious sunshine.  This is the time of year that my dad and I get gleams in our eyes as we begin to envision our summer vegetable gardens.  We conspire as to what new vegetables we will try out.  We sort through our seed collection, throwing out any seeds more than 3 years old and discussing which plants worked well last year and which ones didn't.  We draw diagrams of our raised beds, plotting which squares will be devoted to tomatoes, which to peppers, which to lettuce.  We go on Saturday morning excursions to Northwest Seed and Pet to look at their seed selection.  We go through this process every year, much to the bewilderment of my mother ("Are we actually going to eat rutabaga?" "Why do you plant so many peppers if you don't like how they taste?"), but aside from Christmas, early spring/garden-planning season is my favorite time of year.

This year, we planted our seedlings in mid-February.  We only start peppers, eggplants, and tomatoes this early because peppers and eggplants take a long time to grow and benefit from an early start, and we like our tomato plants to get HUGE, so the earlier the better, I guess.  Other plants we start later or seed directly into the ground in May.  The new veggies we're trying out are rutabagas, parsnips, purple kohlrabi, and brussels sprouts.  Technically, we grew brussels sprouts last year, but they had bugs all over the leaves and didn't produce well.  This year, we're trying again, and if the bugs reappear, I found an organic hot pepper spray (essentially mace for bugs) that doesn't hurt the plant but makes it taste yucky to whatever munches on it.  I hope it works.  Also, my dad is planting more peppers than ever (18 plants!), and has promised that he will try to eat more of them.  We're also doing peppers in our garden, though not as many, and my husband has plans to use the really spicy ones to make a version of Ass-Kickin' Peanuts.

So, spring storms on, but while the garden looks like this on the outside...

...this is what's happening inside the greenhouse :-)